Homesteader's Guide to Growing Peppers: A Flavorful Harvest from Your Backyard
Sammy Yepes
10/9/20234 min read


For homesteaders, cultivating a bountiful garden isn't just a hobby; it's a way of life. Among the myriad crops that can grace your homestead, peppers stand out as versatile and rewarding additions. In this guide, we'll explore the art of growing peppers, from choosing the best seasons for planting to navigating growth stages, and addressing common pests with organic solutions.
Choosing the Right Seasons
Peppers, originating from warmer climates, thrive in well-defined seasons. Here's a quick guide to the best seasons for growing peppers:
Spring Planting (March to May): Start seeds indoors 8-10 weeks before the last expected frost. Transplant seedlings outdoors once the soil is consistently warm, and all danger of frost has passed.
Summer Growing (June to August): Peppers love the warmth of summer. Ensure they receive sufficient sunlight and water during this crucial growth period.
Fall Harvest (September to October): Depending on your location, some pepper varieties may continue to produce well into the fall. Harvest mature peppers before the first frost.
Growth Stages and Care
Germination and Seedling Stage
Start Indoors: Begin your pepper-growing journey by starting seeds indoors. Use a well-draining seed starting mix and keep the soil consistently moist.
Provide Warmth and Light: Pepper seeds need warmth to germinate. Maintain a temperature between 75-85°F (24-29°C). Once seedlings emerge, ensure they receive 12-16 hours of light daily.
Transplanting
Harden Off Seedlings: Before transplanting, gradually expose seedlings to outdoor conditions (harden them off) to acclimate them to the change in environment.
Select a Sunny Spot: Choose a sunny location with well-draining soil. Peppers love sunlight, so pick a spot that receives at least 6-8 hours of direct sunlight.
Flowering and Fruiting
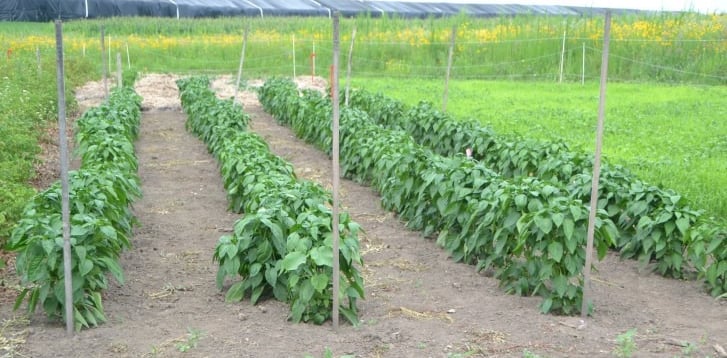
Supportive Measures: As your pepper plants grow, provide support for larger varieties. Staking or caging can prevent branches from breaking under the weight of peppers.
Fertilization: Feed your peppers with a balanced, organic fertilizer during the growing season. This will support healthy foliage, flowers, and fruit production.
Watering: Keep the soil consistently moist, especially during hot and dry periods. However, avoid overwatering, as peppers are susceptible to root diseases.
When to Harvest your Peppers
Pepper Color
Most peppers start off green and change into the color that they’re supposed to be when ripe. For example, banana peppers are traditionally pale yellow.
You can wait for unripe chillies to change color or eat them green. Peppers are edible at any stage. You might even prefer the flavor of an immature pepper.
Pepper Size
Another sign that the pepper is ready is when it’s the size it’s supposed to be when ripe. Cayenne peppers, for instance, can be ~5 inches (13 cm) long and 0.5 inches (1 cm) in diameter when they’re harvest-ready.
Pepper Corking
Some chillies like jalapenos can develop thin, tan lines on the skin known as “corking.” These little stretch marks are seen as a desirable trait. Corking is another way to tell when a pepper is ripe and ready to pick.
Grow Tips
For chillies, “days to maturity” usually refers to the amount of time you can expect ripe fruit after transplanting outdoors. Note your transplant date and then count 60+ days out to get an idea of the first month that you might start harvesting peppers.
Some pepper seed companies include harvesting information on the seed packet. Botanical Interests, for example, has data on pepper size, color and days to maturity on the back and inside flaps of the envelope.
Those first peppers may be smaller than the expected size. Pick these smaller chillies when they turn the ripe color or develop any corking.
When do you pick green peppers? This can be confusing because they’re usually harvested in the same color they start off in. For green peppers like jalapenos and green bell peppers, it helps to refer to the approximate days of maturity and look at the size.
When drying peppers, it’s best to pick them when they’re ripe or even slightly overripe. This means they might be a little wrinkled on the plant. Choose your best peppers. You don’t want to harvest chillies that have insect damage, disease or issues like brown spots or tears in the skin.
Wear gloves if you’re picking hot peppers. The oils from these spicy chillies can irritate skin and eyes!
Common Pests and Organic Solutions
Aphids
Spray a mixture of water and neem oil on affected plants. Ladybugs are natural predators of aphids and can be encouraged in your garden.
Spider Mites
Regularly hose down your plants to dislodge mites. Introduce predatory mites or ladybugs to keep their population in check.
Flea Beetles
Planting companion plants like basil or using a neem oil spray can help deter flea beetles. Mulching around plants can also be effective.
Hornworms
Handpick hornworms and drop them into a bucket of soapy water. Planting marigolds or using diatomaceous earth around your peppers can act as a deterrent.
Slugs and Snails
Place copper tape or diatomaceous earth around the base of your pepper plants. Beer traps or coffee grounds can also be effective.
Conclusion
Growing peppers on your homestead is a rewarding endeavor that brings both flavor to your table and a sense of self-sufficiency to your lifestyle. By understanding the best seasons, growth stages, and implementing organic solutions for common pests, you can ensure a thriving pepper harvest that complements your homesteading journey. So, roll up your sleeves, get your hands in the soil, and enjoy the rich experience of growing your own peppers right in your backyard. Happy homesteading!


